Helpdesk
2 minute read
How to Add Mods to Your ARK: Survival Ascended Server
Installing mods is a great way to enhance your gameplay experience on ARK: Survival Ascended. With RocketNode, adding mods is quick and easy using the MOD IDS field in the configuration tab.
Steps to Add Mods:
-
Log into the RocketNode Panel
Visit panel.rocketnode.com and select your ARK: Survival Ascended server.
-
Stop Your Server
Always stop the server before making configuration changes.
-
Go to the Configuration Tab
Inside the panel, navigate to the Configuration tab.
-
Locate the MOD IDS Field
Find the field named MOD IDS. This field accepts a list of mod IDs, separated by commas and without spaces.
-
Find the Mod ID
To find a mod ID, go to the mod’s CurseForge page. The MOD ID is displayed on the right side under the “About Project” section.
For example, to add the mod Super Spyglass Plus, the ID is
929420.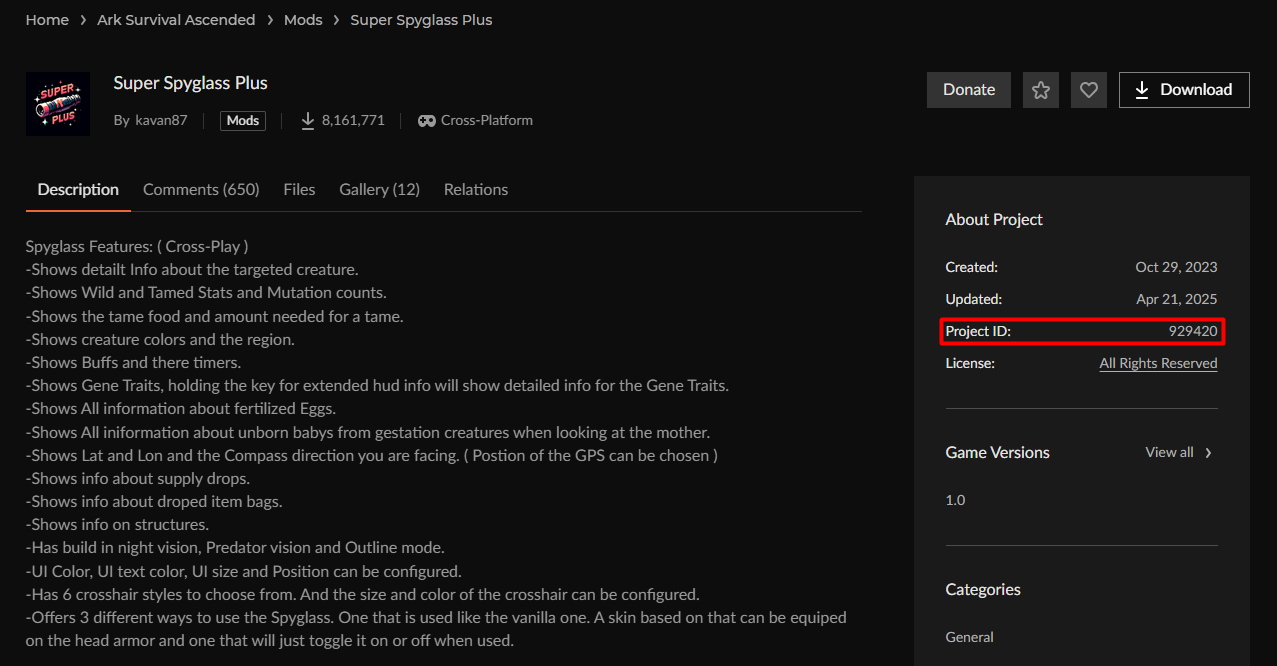
-
Add the Mod ID
In the MOD IDS field, enter the ID:
929420To add multiple mods, separate their IDs with commas like so:
929420,123456,789101 -
Start Your Server
Once you’ve entered the mod IDs, scroll back and start your server. Mods will begin installing automatically.
Your selected mods will now load when the server starts. If you ever want to remove a mod, simply delete its ID from the list and restart the server.
your hosting partner
RocketNode offers fast and affordable game and VPS hosting solutions on reliable and efficient hardware with AMD Epyc architecture and NVME storage to assure high performance.
See games & pricing